I've produced many self-portraits in my time so I thought it would be fun to have a little retrospective and look at my skills through the years.
 This wonderful drawing was made in reception class, so I was age 4/5. I hadn't quite grasped the concept of shoulders but I did draw fingers. I also made a good attempted at the check print on my school dress.
  A year later and now my arms are coming from the right part of my body, though I have taken a step backwards with the fingers. To be honest, it was probably laziness.
 On to year 4 (age 8/9) and I have both fingers and a neck. Definite progress. I've also done away with the spider eyelashes from the previous drawings in favour of a more natural look. Good work younger-me!
 I now skip ahead to year 9 (age 13/14) as I seem to have misplaced all of my artwork from middle school. I've moved on from colours pencils to poster paint, and my hair has gone from blonde to brown. I even have ears and eyebrows and a varying pose, though I do miss the beaming smile present in the other drawings.
 Year 12 now (age 16/17) and I have my medium of choice; oil paints. This was painted just from observation so it doesn't look like me very much, but it was displayed in the Principal's office for a while so it can't be that bad.
 Year 13 (age 17/18) and I achieve a likeness I am happy with by working from a photo, which is the way I have worked since. This was from a whole portraiture project so I was experimenting with different colours and backgrounds.
 I painted this in the summer of 2008, for funsies, and I loved painting the hair. I still haven't got eyes quite right though.
 This painting is from summer 2009, right before I went to university.
 Inspired by this look I created another version of my fingernail necklaces. Instead of black nail varnish I just used black acrylic paint and covered them with layers of PVA glue. There's no danger of these nails chipping.
 I started by drilling three holes around the side of of the bottle cap. You can put more for extra security when it comes to the sewing part but I'd say three is the minimum. (That's my
  Using a colour thread that matched the bottle cap, I sewed the cap to the rosette. It is a good idea to make sure the holes you drill are big enough to fit your needle through.


 Korean artist


 Age 4
Age 4 

 It was fun experimenting with different sizes of rosettes and colour combinations.

 This brown bag was £1.40 and is quickly becoming one of my frequently used favourites.
 75p for a stripey skirt. You can't go wrong.


 I love a good play on words so this card from
 It's a little less crazy than the original but I like it. I went through old magazines cutting out all the circle shapes; car wheels, watches, rings, cakes, plates, flowers, and then printed out a photo of my head and cut around the hair. I arranged the circles with the face on a piece of purple sugar paper, going underneath the ears with the circles but on top of the forehead. Then I grabbed my trusty glue stick and got sticking. Simples.
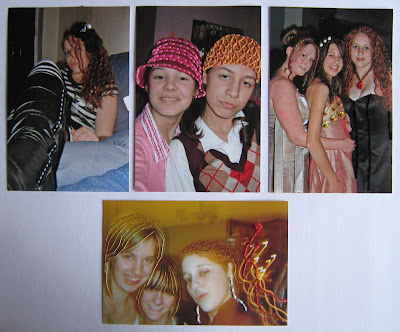 I know that photoshop is awesome, but jazzing up a photo by hand is fun too. Lots of websites have registration offers for free prints (Jessops, Snapfish, Photobox...) so there's no excuse not to have a glossy 6x4 in your hand. The way photos used to be.
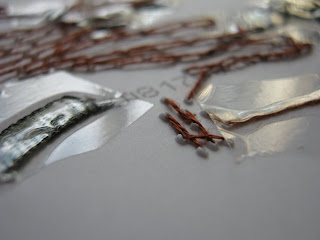 A needle pierces photo paper quite easily, and instead of tying a knot at the back when I was done, I just stuck the thread down with sellotape so it was secure.


 A shot of the opening sequence. Yum!
 The Bueno and Oreo pies were not so successful.


 With this bracelet I used two pieces of thicker elastic and threaded both of them in and out of the beads so they were side by side instead of end to end.
 I threaded this bracelet the same way using a random combination of different sized and shaped clear, silver and black beads.