Pages

Monday 31 May 2010

Let's go fly a kite

Kites are fun right? So why not wear one in your hair!

This hairclip is super easy to make. All you need is two colours of felt, matching thread, a hair clip and maybe some strong glue.

Start by drawing out a kite shape on paper as a template and cutting this shape out of one of the pieces of felt.

Then fold the template in half and cut this shape out of the other piece of felt. You then want to cut this in half so you have two smaller triangles.

Glue or sew the smaller triangles to the main kite shape.

Next glue the hairclip to the back of the kite shape.

I also sewed mine on a bit for extra security.

Cut out three -or however many you want- small rectangles of felt. These will be the bows hanging off the kite.

To make the bows get a length of thread and tie a knot in it around the middle of the felt rectangle. Do this with the rest of the rectangles on the same piece of thread.

Sew the end of the thread with the bows on to kite, and you're done!

Friday 28 May 2010

Biology

This is me at college last year. It's also me doing art research. Crazy I know!

I got to go up to the biology department and study the specimens under a microscope, taking photos and making drawings.

This is part of the stomach I think...

This is a rat's heart

This is definitely an eye. And I can still name most of the parts. Thank you A-level biology.

This is a piece of muscle tissue which influenced one of my final pieces that year.

Here are my three final pieces; a blood clot, muscle and bone.
The paintings are 1x1m using mainly acrylic paint with string, mod rock and tights. I was looking at contrasting scale - taking something really small and showing it really large- which is something that I still explore with my art.

Wednesday 26 May 2010

Bunting!

I love me some bunting.
Here's the pink bunting in my room in my student house. (The picture was taken right when I moved in. The wall has since been covered in pictures and my desk is a lot more messy.) It's made from different shades of pink sugar paper, wrapping paper and the very light pink is the wall paper from my bedroom back home.

More bunting;

Check out this mini bunting motif on gift tags made with a pencil rubber stamp on Creature Comforts

I love this mini bunting birthday card from How About Orange.

This innovative bunting inspired paper necklace is by Paper Bling.

Monday 24 May 2010

The Bead Shop

In July/August of 2008 I went to Queenstown, New Zealand with my family. One day, while my Dad and my sister were white water rafting, my Mum, my other sister and I went to check out The Bead Shop.

This shop was awesome. The walls were covered in jars of all kinds of beads and you could just buy a bunch of beads, buy something already made with the beads, or sit down and make a necklace or bracelet using the supplies in the shop, and the shop lady even helps to attach the findings.

It was definitely a better way to spend an afternoon, rather than being outside in the cold white water rafting, and you get a nice view of the mountain from the shop window.

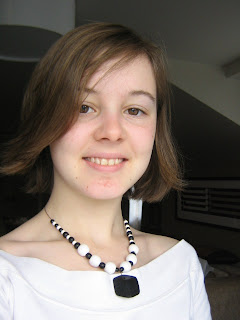
Here's the necklace I made; black and white wooden beads with a geometric pendant.

So if you're ever in Queenstown, NZ, I suggest you check it out. And while you're in town you might as well have a fergburger.

Friday 21 May 2010

Bottle tops

Does anyone else find it annoying how you can recycle bottles but not bottle tops? For some reason, like toilet rolls, we don't throw out our bottle tops in my student house. So this it what I've done with them:

I used them to frame miniature portraits in my latest art project.
(Yes Lizi, that's you..no, not the one with the beard...)
Amanda at Crafts by Amanda made them into cute little ladybirds

And I saw milk bottle top being used at the Recycled: Design for Life exhibition at the V&A. 14 year old Lucy, from Dorothy Stringer School in Brighton, used milk bottle tops and scraps of gingham fabric to create an outfit inspired by the skinhead subculture.

Wednesday 19 May 2010

6 eggs makes 3 cakes

The past 3 weekends I have got my bake on and cooked 3 different cakey delights. Much to the approval of my housemates.


The first was a simple Victoria Sponge cake with butter cream icing and jam in the middle. It was relatively uneventful which is why there's only this one photo to document. It sure did taste good. The recipe was from this student cookbook.


The next week I ended up buying 1kg of carrots for 35p and then realising that was far too many but all logic goes out of the window when I see a yellow reduced sticker. So cake #2 was to be a carrot cake!
There was a slight problem in that I've never had carrot cake before so I didn't know what it was supposed to be like. Hence the mess it turned out to be due to cutting it open many times to see if it was done and then putting it bake in the oven.
I got the recipe from here but halved the quantities and cut out the nuts, which may have been the problem as I should have substituted them instead..maybe..

But if there's one thing I've learnt from Bakerella it's that a photo with the macro setting will make any food look delicious. And to be fair the cake did taste pretty good, with orange icing. Nom nom nom.


The last of my eggs were used for an old family favourite; chocolate brownies. These were the easiest to make as they cook in the microwave. At home I usually add chocolate drops into the mix but alas, poor students can not afford such luxuries.

Here's the mouth watering macro shot.
And here's the recipe:

Chocolate Brownies (Microwave on full power – 650W)


4oz plain flour, sifted 2 eggs, beaten

1/2 tsp baking powder 8oz granulated sugar

1oz cocoa 1/2 tsp vanilla essence

3oz margarine white chocolate drops to taste (optional)


1. Sift flour, baking powder and cocoa together

2. Melt the margarine in the bowl for 45 seconds on high

3. Beat the eggs and the sugar into the margarine

4. Fold in the flour, baking powder and cocoa

5. Stir in the vanilla essence and chocolate drops

6. Pour the mixture into the lightly greased and lined dish

7. Cook on high for 5-6 minutes or until the brownies are just

dry on the top and beginning to come away from the edges of the dish

8. Leave to stand in the dish until cool


Monday 17 May 2010

What a hoot

My friend was raving about this card from M&S so I decided to make my own version for her birthday. Which is today; Happy Birthday Robyn!

Owls + buttons + googly eyes = Awesome

I've discovered that owls are very big at the moment (big as in popular, not giant owls- that would be weird)

Check out these owl cushions at RJB Stone

These cute owl pom poms are super simple to make. Find out how at maedchenmitherz

Owl cupcakes! Nom nom nom. From Catching Fireflies

And speaking of fireflies...


:)

Friday 14 May 2010

Bows!

I made a bow!

And here's some other wearable bows from the craft world:

I love these dainty bows made into a ncklace by Jenna C. on Cut Out and Keep

Sharlene dresses up a basic t-shirt with a homemade lacey bow.

And something for the boys; Linda Permann on Craftzine made this crocheted bow tie.

Wednesday 12 May 2010

More from the V&A

Here's some more cool stuff I saw at the V&A
This Walkers Crisps handbag is by Anya Hindmarch, who designed the I'm not a plastic bag bag. It's a piece from her Sweeties collection where she used familiar grocery brand names in the place of designer labels.  
I think real crisp packets should have sequins on.

Continuing with the crisp theme I also saw this outfit in the Design for Life: Recycled exhibition.
14 year old Emily from Dorothy Stringer School constructed this garment when working with the Brighton Museum & Art Gallery. Influenced by the hippy subculture she took a second hand skirt and added flowers cut out of crisp packets.


For more information about the project go here.

Monday 10 May 2010

Ribbon wrap bracelet

You can make this bracelet using just a plastic bangle and ribbon, and then add more to embellish it.

I started with this plastic ring that I found in my house, but you could of course use an actual bangle

Wrap a piece of ribbon around the ring. Wide ribbon is best to initially cover the plastic. You can stick the start of the ribbon to the plastic with glue or tape, or just hold it in place until the ribbon comes around again to secure it. 


You can sew the end of the ribbon in place with thread, or use glue or double sided tape. The stitching can be covered with more ribbon and embellishments so it doesn't have to be neat.

I then wrapped a thinner piece of white ribbon around the bracelet...

...and some silver ric-rac for decoration.

I then made a matching yo-yo (learn how here) using white fabric, the silver ric-rac and a pink button.

I then attached the yo-yo to the bracelet. You can do this by sewing it or maybe with hot glue.

And here's an alternative design using thick shiny ribbon where the ends were tied in a bow with a crotcheted butterfly that my mum made attached.