Pages

Showing posts with label bag. Show all posts

Thursday, 17 October 2013

More Make-up Pouches

As warned, I made some more make-up pouches once I'd bought some zips from Ebay.
10 for only £3.80!
I used more plasticy fabric from the scrap store including the cool text one I used on a previous bag.

All the pouches are lined with matching fabric.
The black comes from the under layer of a broken dress my sister was throwing out.
Nothing gets wasted! 

The spotty fabric was not from the Scrap Store.
It's the excess fabric from our ironing board cover which is cool because it means it's slightly padded as there's a thin layer of sponge/foam.
I repeat: nothing gets wasted.

Tuesday, 8 October 2013

Clutch Purse

Since I'm on a bag making roll I came up with this clutch purse.
I made it the same way I made the make-up pouches, except I didn't flatten the corners.

The materials I used were some tan coloured vinyl material, from the Scrap Store, and the bottom frill off this dress my friend donated to my craft supplies.

I was very impressed with myself that I managed to line up the frill along the seam.

I finished it off by sewing a little zipper tag with a scrap of the tan fabric.

What do you guys think? 

Tuesday, 1 October 2013

Make-up Pouch

I got this awesome fruit fabric, which is kind of plastic-y, from one of my trips to the Scrap Store.
I don't know why it's taken me so long to think of something to make with it.
All I had to do was look at my Primark toiletries bag for the inspiration. 

 I think this was my first time working with a zip. I only had to unpick and start again once because I'd sewn the fabric too close to the zip. 

I referred to two tutorials when making this bag.
and

After the success of the first pouch I made another one, again using plastic fabric from the Scrap Store.
I even got a bit fancy and added a tag that you could attach a keyring to. 

I think hot pink lining was a good decision.  

I'm definitely on a roll now so expect to see a lot more of these little pouches in the future.

Thursday, 18 July 2013

Bag #2

After the success of the first bag I made I thought I would try making another.

I got this awesome plastic fabric from the Scrap Store.
In fact everything I used for this bag, with the exception of the black fabric on the bottom, came from there; the straps, the lining fabric, the binding, and zip.
I love that place.

I had an idea in my head of what I wanted the bag to look like and it took my brain a while to figure out how to translate that image into a method.
It was actually quite simple; two sides sewn to the bottom piece with the straps going over the patterns fabric and under the black. Then sew up the sides.

This technique for making the corners of the bag is my new favourite thing.
I originally saw how to do it on this blog post.

I thought this would be an easy way to add a zip. And I was right!
I sewed the zip to two strips of fabric which I then attached to the lining. This saved me trying to attach the zip directly to the lining.
I then added little fabric tabs on either end of the zip to tidy it up.

The inside lining is a little baggy but it works.
And of course I put an inside pocket in for those who always lose their keys at the bottom of their bags.

My Mum thinks the material I used for the straps is actually what they use for chairs to hold the seat.
At least I know it'll be really strong.
I used some black binding over the part where lining meets outside of bag to make it neat.

I got a lot of that plastic material from the Scrap Store, so I wonder what I'll make next.

Tuesday, 4 June 2013

I made a bag!

I made a bag!
Guys, I'm pretty proud of this.

The black plastic-y leather looking fabric I used was an off-cut in the bargain bin at The Range.
I've previous used it to make a camera case and a bow necklace.
The lace on top is an old net curtain and I got the idea to add that from a re-style on Studs and Pearls.

I was able to sew this fabric using the sewing machine which was a relief otherwise my plans for the bag would have been ruined.

I also added some velvet ribbon round the edge of the flap because I thought it already has leather and lace, why not add another trend!

The strap is a detachable strap from another bag which I can clip on and off the metal rings which are from some old key rings.

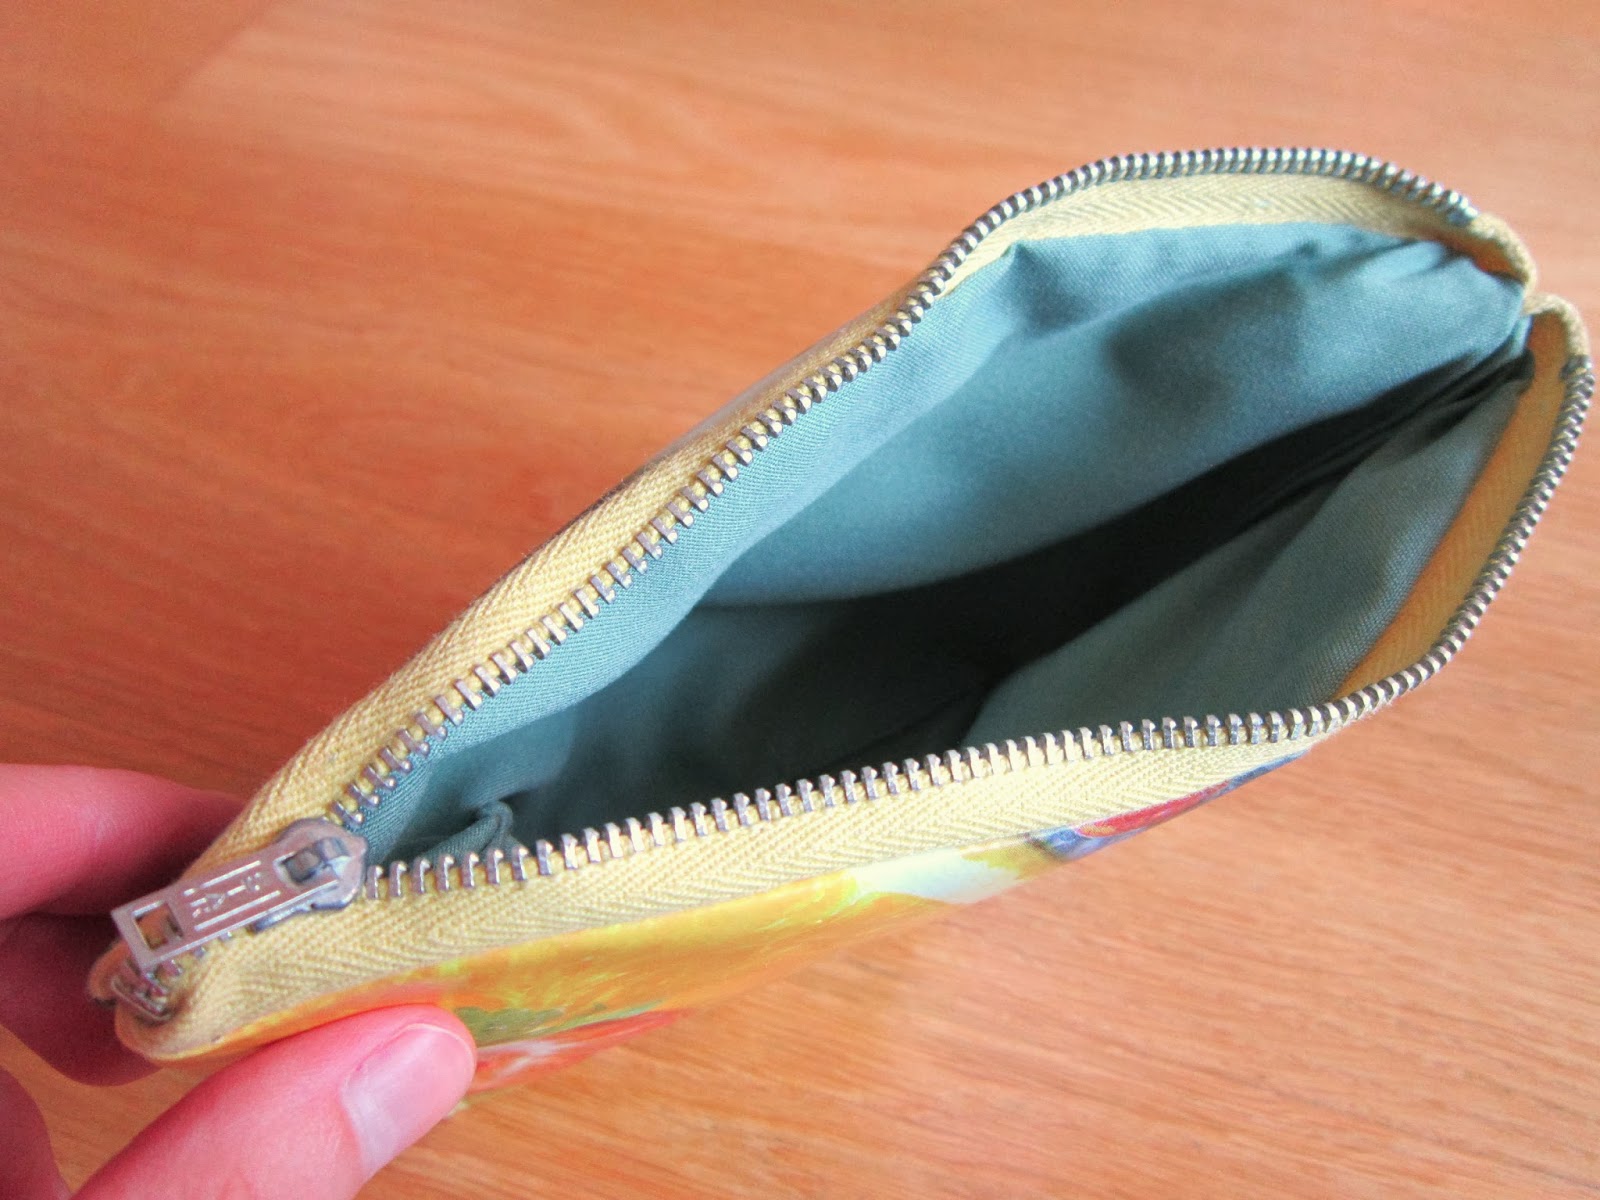
I think my favourite part of the whole bag is the lining.
Firstly because I actually managed to sew lining, and second because it's pink and stripy.
The fabric is from an old pillow case but I'm not sure whose because I don't recognise it as one of ours... 

The bag fits everything I regularly carry!
My diary (yep, I kick it old school with a paper planner, rather than using the calendar on my phone), my purse, my glasses, my phone and I made sure to sew a little pocket onto the lining for my keys because otherwise I'll lose them at the bottom of the bag.

For the closure on the bag I've used self-adhesive magnet strips.
They're not that strong so I'll see how they go. They're not strongly stuck on so I can always change them for something else.
I just didn't want something that I had to sew onto the bag which might pull and rip the fabric.

I've used it a few times and it hasn't fallen apart yet, so it's going well!

Monday, 21 March 2011

Envelope bags

I realised I've never shown y'all these bags I made a few years ago.
They're cute clutches made to look like envelopes with a chain strap and embroidered french address.

And yes, that embroidery took a very long time.

As well as these two I made a third bag as a commission for my sister's friend with her own choice of name and address.


I got the idea after seeing this picture which I've only just found out is from Bedcrumb.
They make all sorts of stylish accessories and there's loads of pretty things on their website, so I suggest checking it out.

Friday, 29 January 2010

Plastic bag clutch

I learnt how to fuse plastic bags here. It's a really good way of using up some of those plastic bags that we all have lying around (although there should be slightly less if y'all are using bags for life). To make this clutch bag I started with a large sheet of plastic which I created by fusing about 7 layers of plastic bag. I wanted to use a particular plastic bag with this pink flower print as the outside of my bag so that went on top with another clear plastic bag on top of that to make sure the print didn't come over. When I ironed over it it went crinkly, which I wasn't expecting, but it provides an additional texture to the bag.
The bag is a simple design. The sides were folded in and hand sewn together, and I put a kitchen roll tube with a slit cut out in the bottom so the bag would maintain it's round shape.
To close the bag I attached to large poppers to prevent it from flying open.
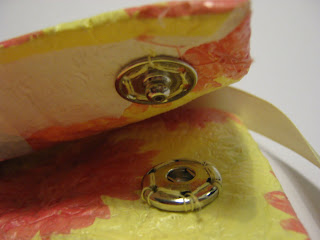
I decorated the outside by sewing a few sequins and beads around the flowers on the print.

I also added a length of ribbon under the fold of the bag so it can have a strap if I want it to, but it is removable so it can still be a clutch bag.